![]()
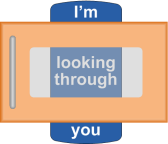
 This is the second in a series of articles about techniques for creating realistic depth in Visio shapes. Part 1 discussed how to create a metallic panel with edges that curve back and away from the plane of view. In this part we will show you how to insert a “window” into that same panel by using Visio operations called Subtract and Fragment. Then we’ll make it transparent like a real …Continue reading

 The best way to extend the value of any asset is to use it and re-use if for multiple purposes. This goes for Visio shapes just as well as any other type of content such as images, text articles, etc.
 In our previous post we discussed how to embellish your Visio drawings with clipart… you’re not restricted to the stencils that Visio provides. We’ve created a FREE Visio People stencil that you can download from www.shapesource.com by clicking on the image below. You’ll be asked to open an account so that we can manage your download but don’t worry… we won’t share your information with any other parties.
 One of Visio’s most helpful features is the ability to snap and glue objects together with Connection Points. These are the little blue “x” symbols that you can see on many pre-made Visio shapes that come with the product or from other sources such as www.ShapeSource.com. Here we’ll discuss how to insert additional connection points in Visio shapes that you have downloaded or created yourself. While the basic operation is quite simple, we’ll explain what to watch out for so

 We’ve created a Microsoft Xbox 360 shape that you can download free from ShapeSource.com. It’s a useful demonstration of the quality and features of Visio network equipment shapes produced by Visimation. There are 4 master shapes on the stencil: Front, Rear, Perspective, and All. The All shape provides a right click menu for toggling between the 3 views. We did this to show a couple of options… separate master shapes for each view or one master containing all views.